
Making candied oranges couldn’t be any easier. You can make candied orange slices and use them to decorate your cakes or desserts or enjoy them as they are!
Previously I’ve shared my candied lemon slices and used them to garnish my desserts. Today I share the candied orange slice recipe that I’ll use to garnish my chocolate orange cake with chocolate orange ganache.
I believe desserts reach another level with the addition of candied oranges, or any candied citrus. They add an elegant touch.
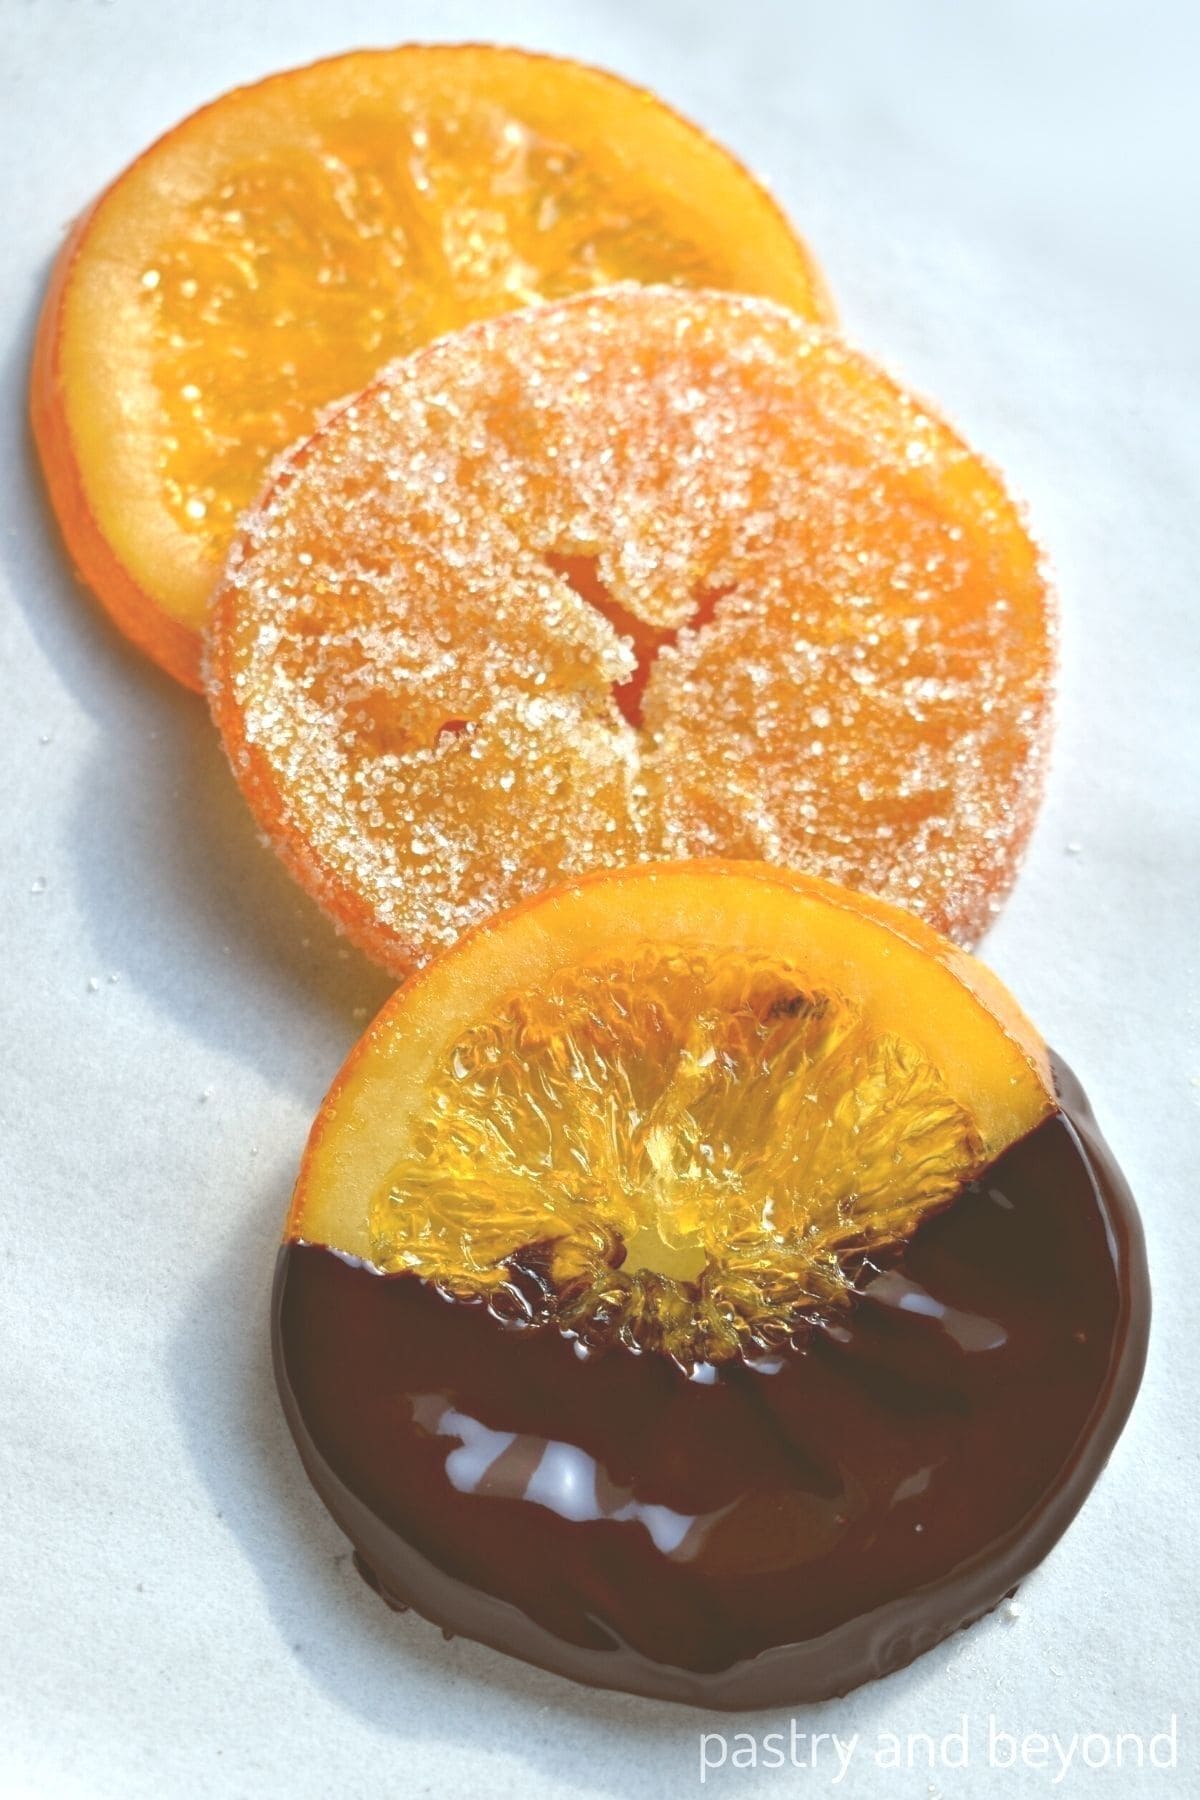
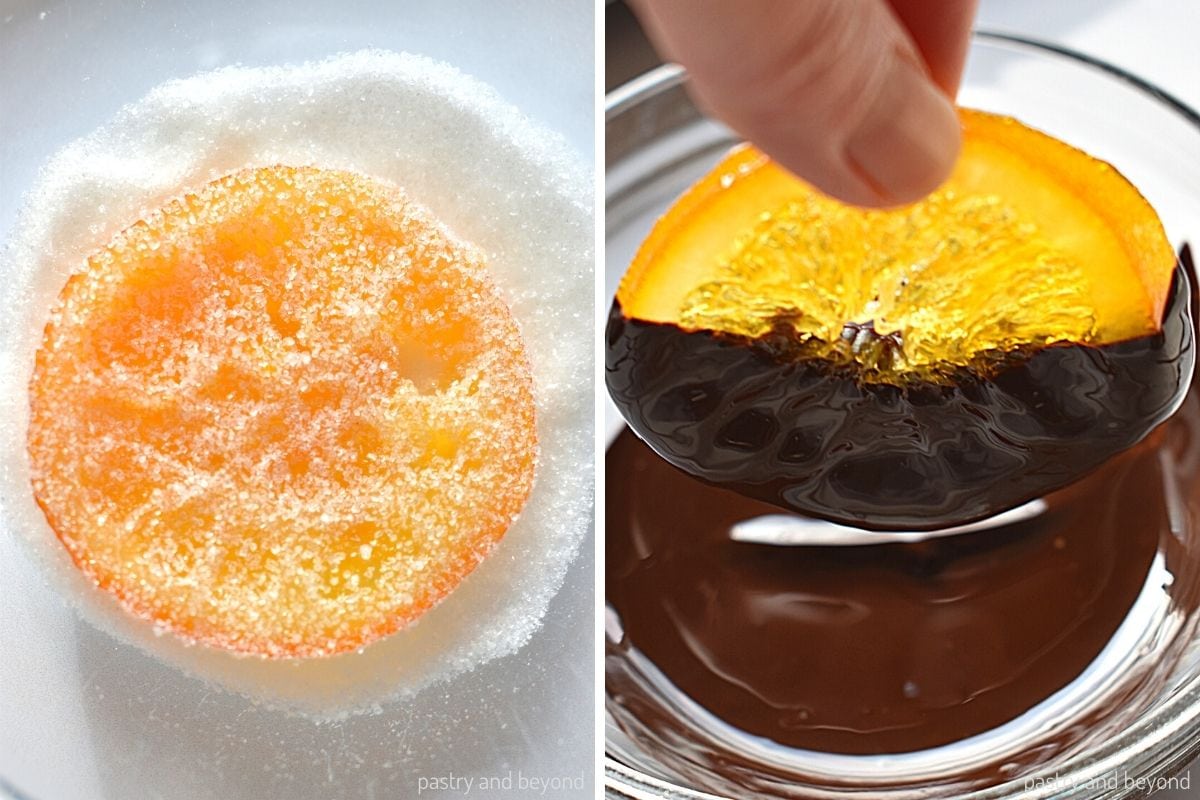
But of course, you can eat them as they are or sprinkle sugar on top or enjoy them as chocolate-dipped candied oranges.
The steps are similar to my candied lemon slices but today I use a little less sugar while making the syrup.
If you are looking for candied orange peel, you can check my chocolate covered candied orange peels recipe.
Ingredients you’ll need
You can find the exact quantities at the bottom of my post, in the recipe card.
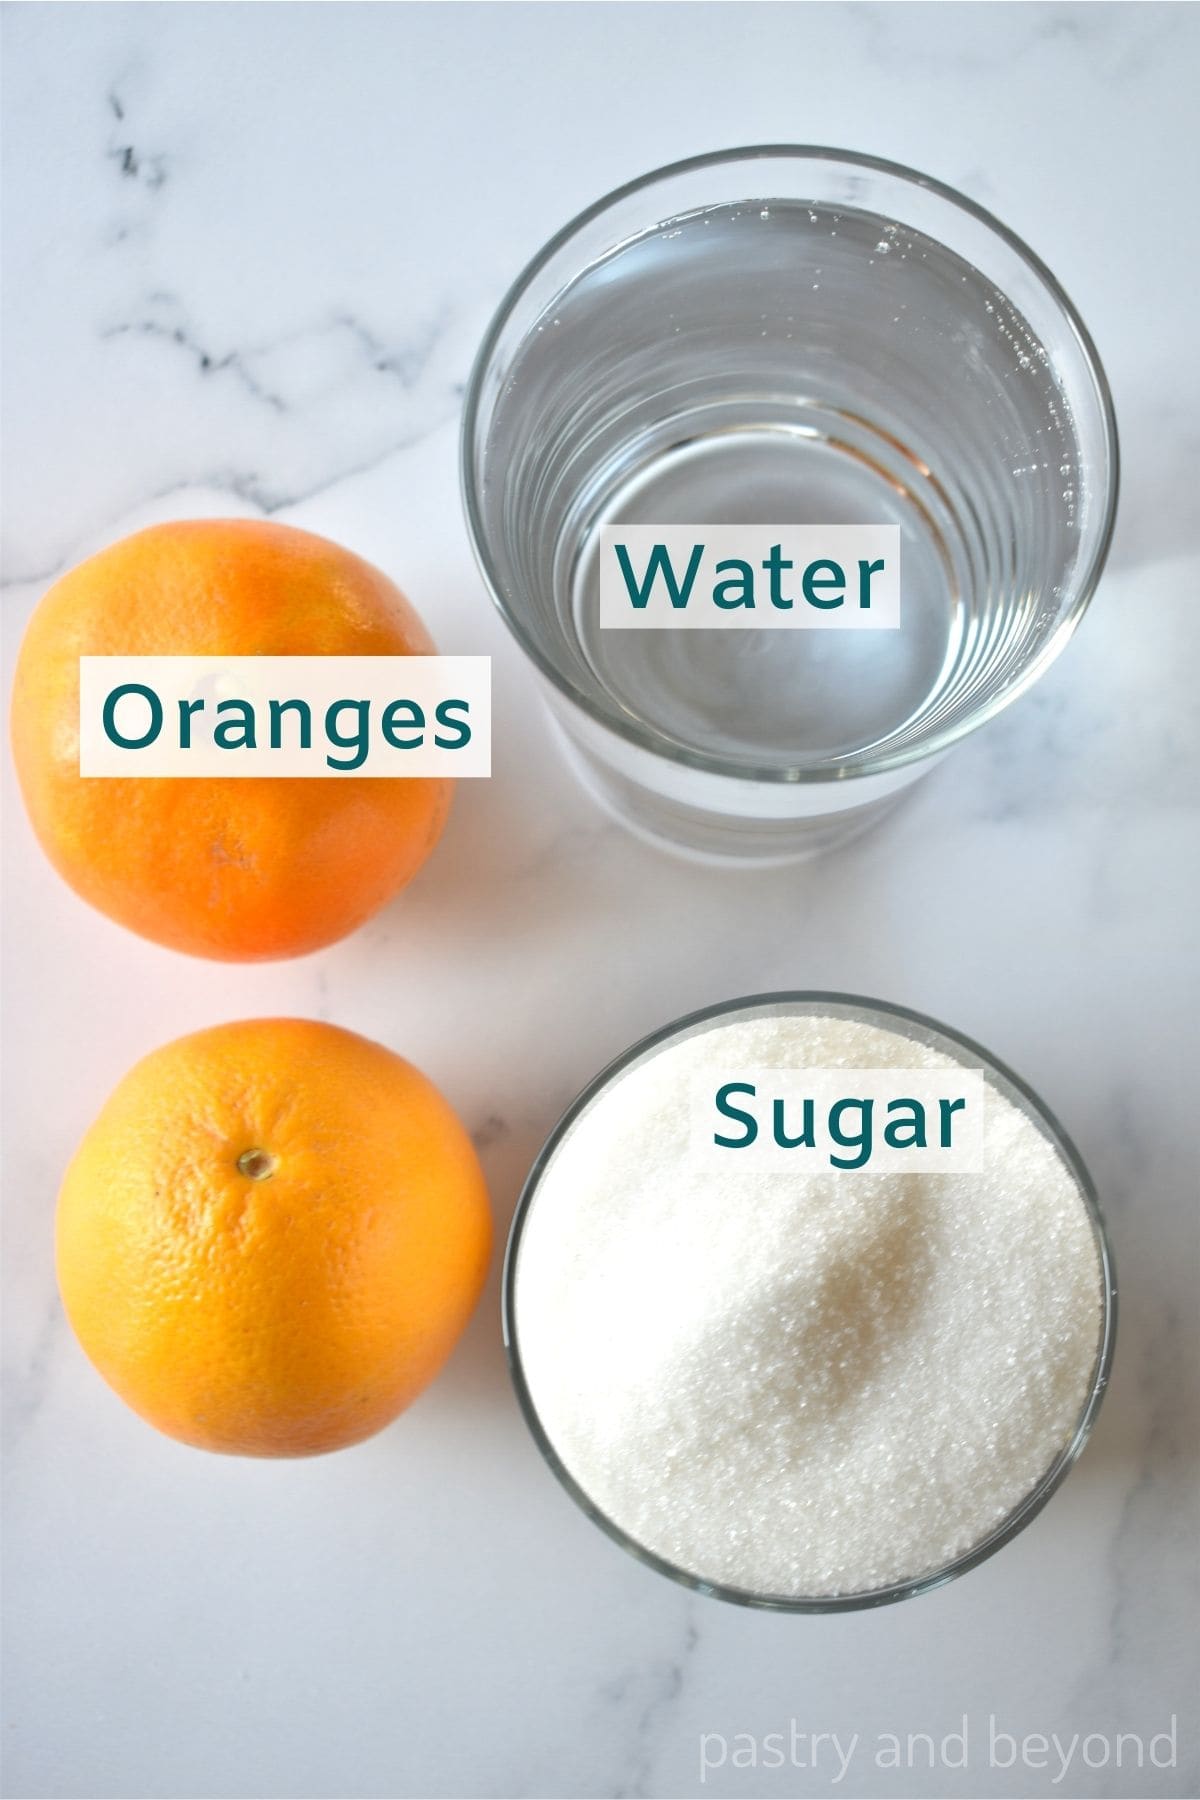
- Oranges-I use medium oranges, if you use large oranges, you may need to increase the sugar-water amount.
- Sugar-I use granulated sugar to make syrup.
- Water-I use water to blanch the oranges to avoid the bitterness that comes from the pith and to make the syrup.
Step by step instructions
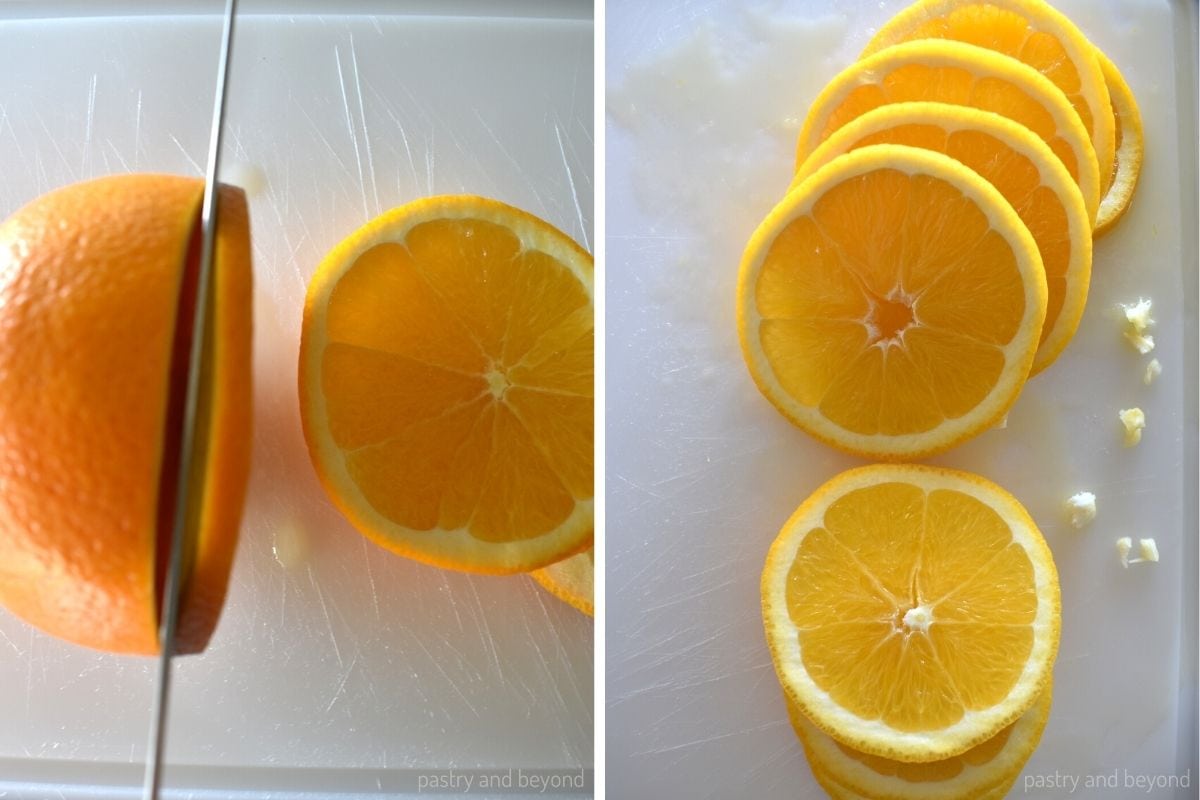
I wash the oranges. Then I cut two ends of the oranges and slice them into ⅛ to ⅙ inch (3-4mm) thick slices. I use a serrated knife as I feel like I have more control but sometimes I use chef’s knife too. You can use either of them.
If there are white parts in the middle,I remove them too.
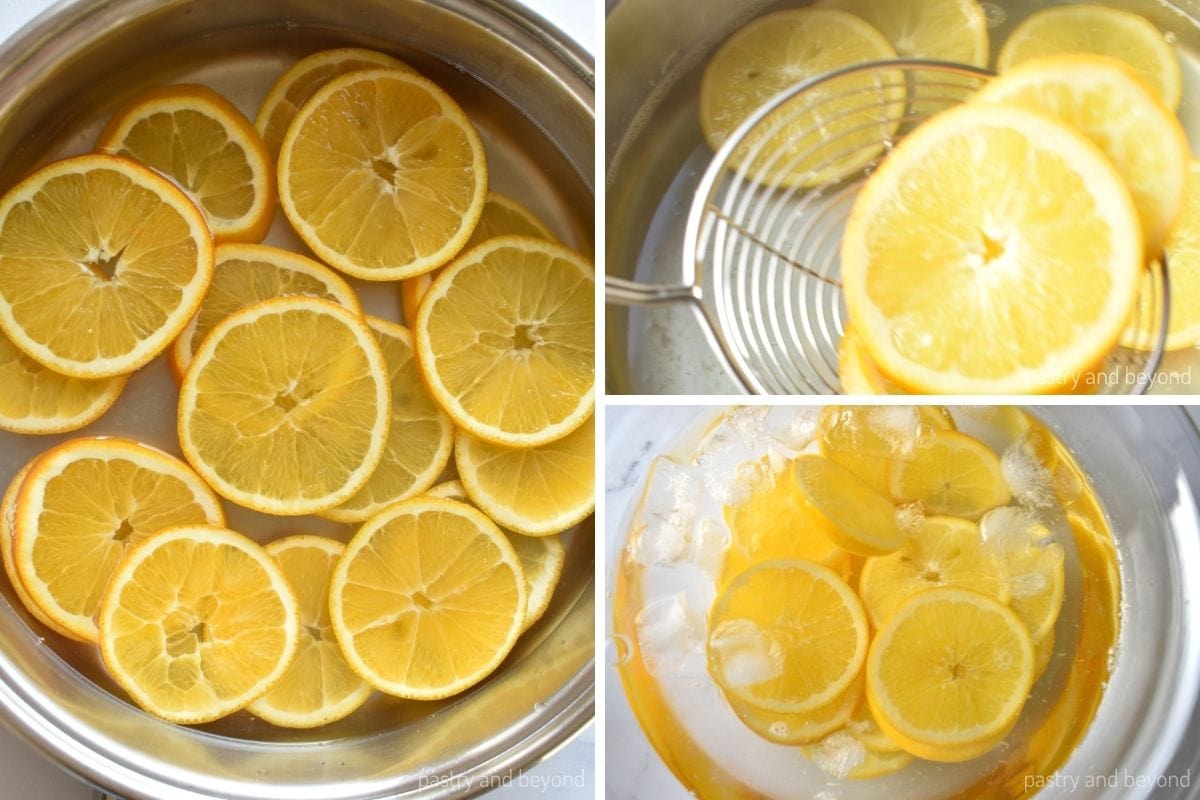
Then I continue with the blanching step. I place orange slices in a large pan, cover them with water and bring to a boil over medium heat.
As it boils, I reduce the heat to low and let it simmer for 2 minutes.
In the meanwhile, I fill a large bowl with cold water and ice. After 2 minutes, I use a slotted spoon to remove the orange slices. I place them into ice-cold water to avoid them cooking.
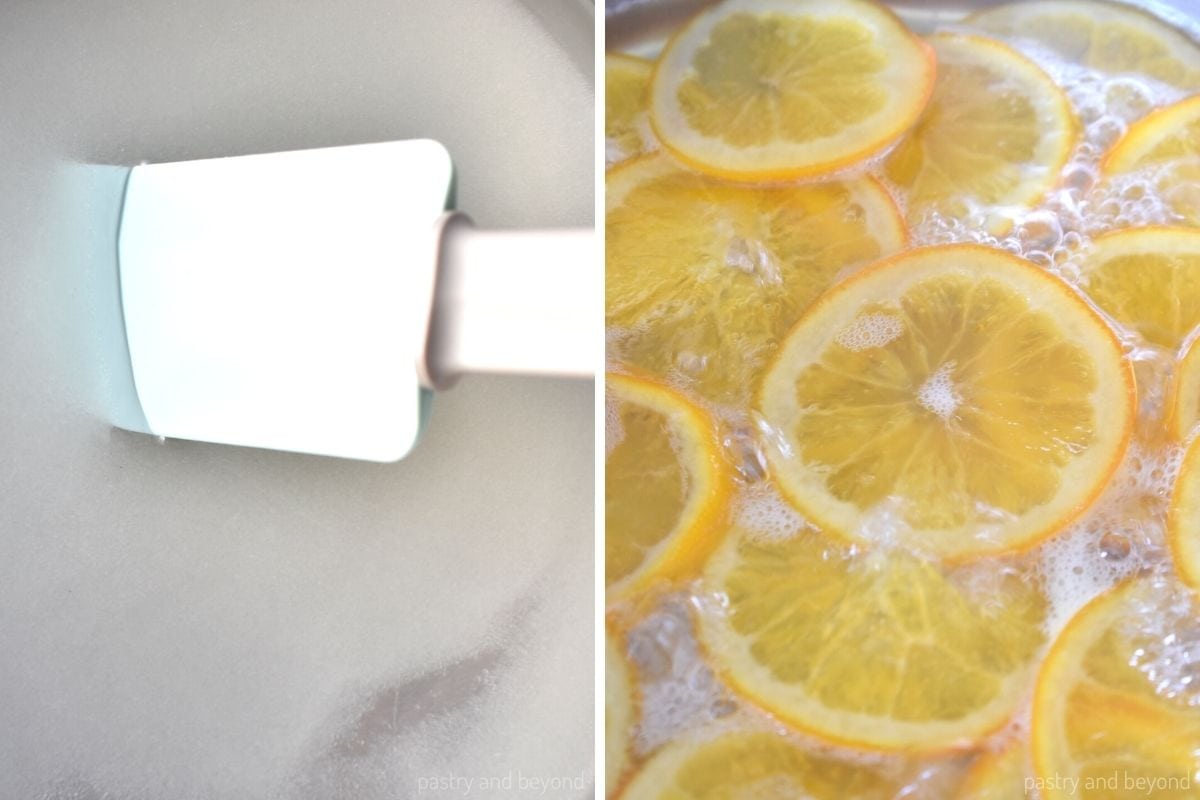
While they are in ice water, I stir water and sugar to prepare the syrup. Once they are completely mixed, I add the orange slices.
I check the slices and use tongs to turn them around from time to time to make sure they are all covered with syrup.
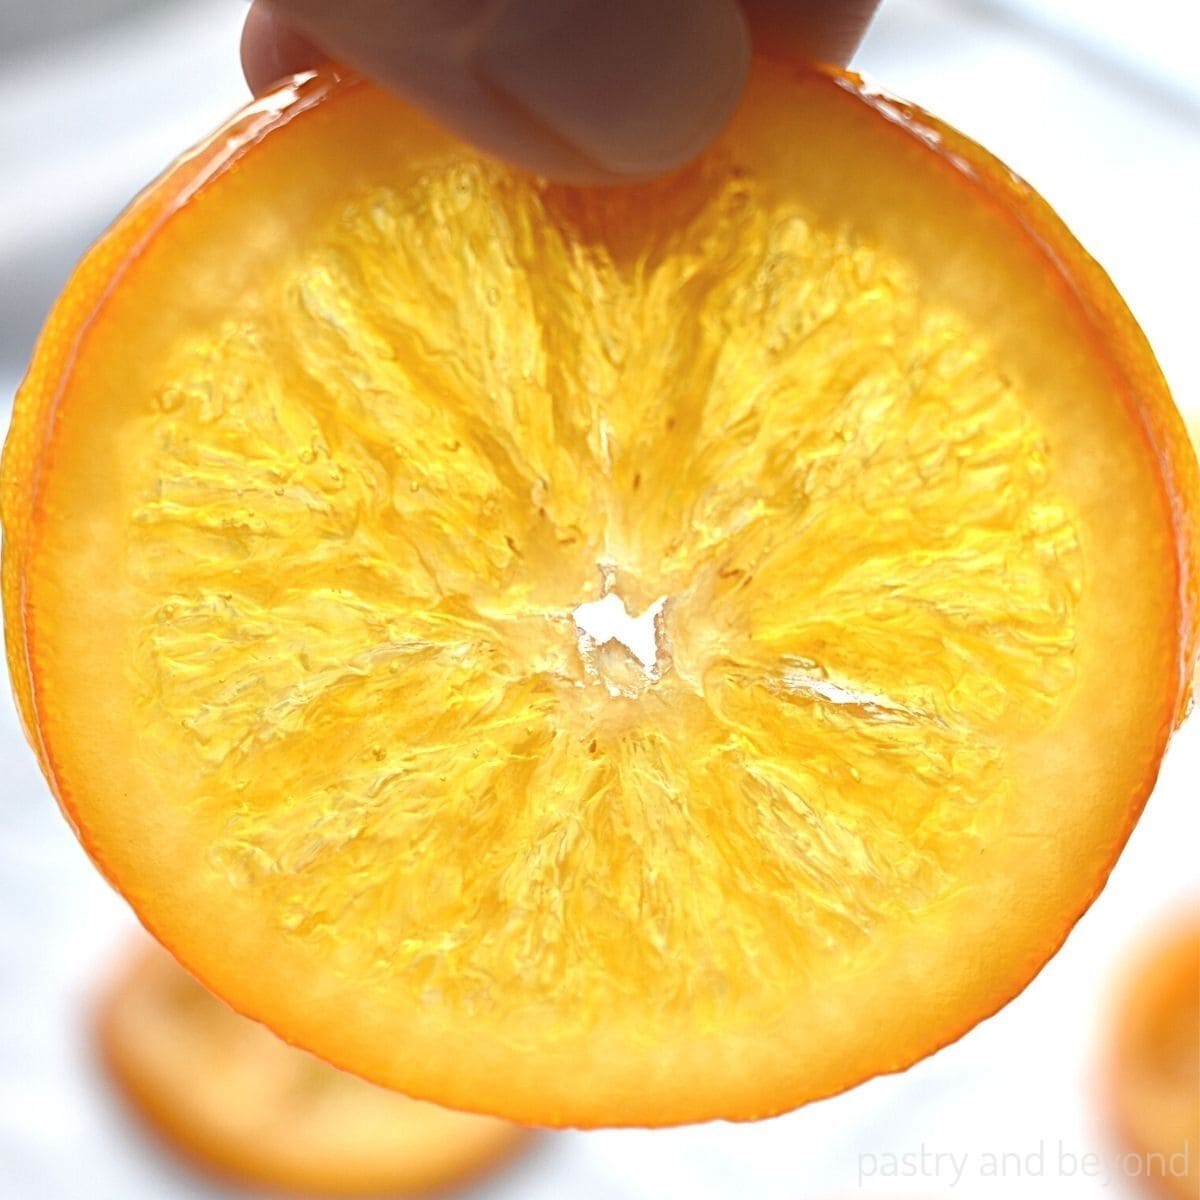
When compared to my candied lemons, these oranges take a little longer than them to candy as this recipe has less sugar. It takes almost 45-50 minutes until the slices look almost translucent and the sugar thickens.
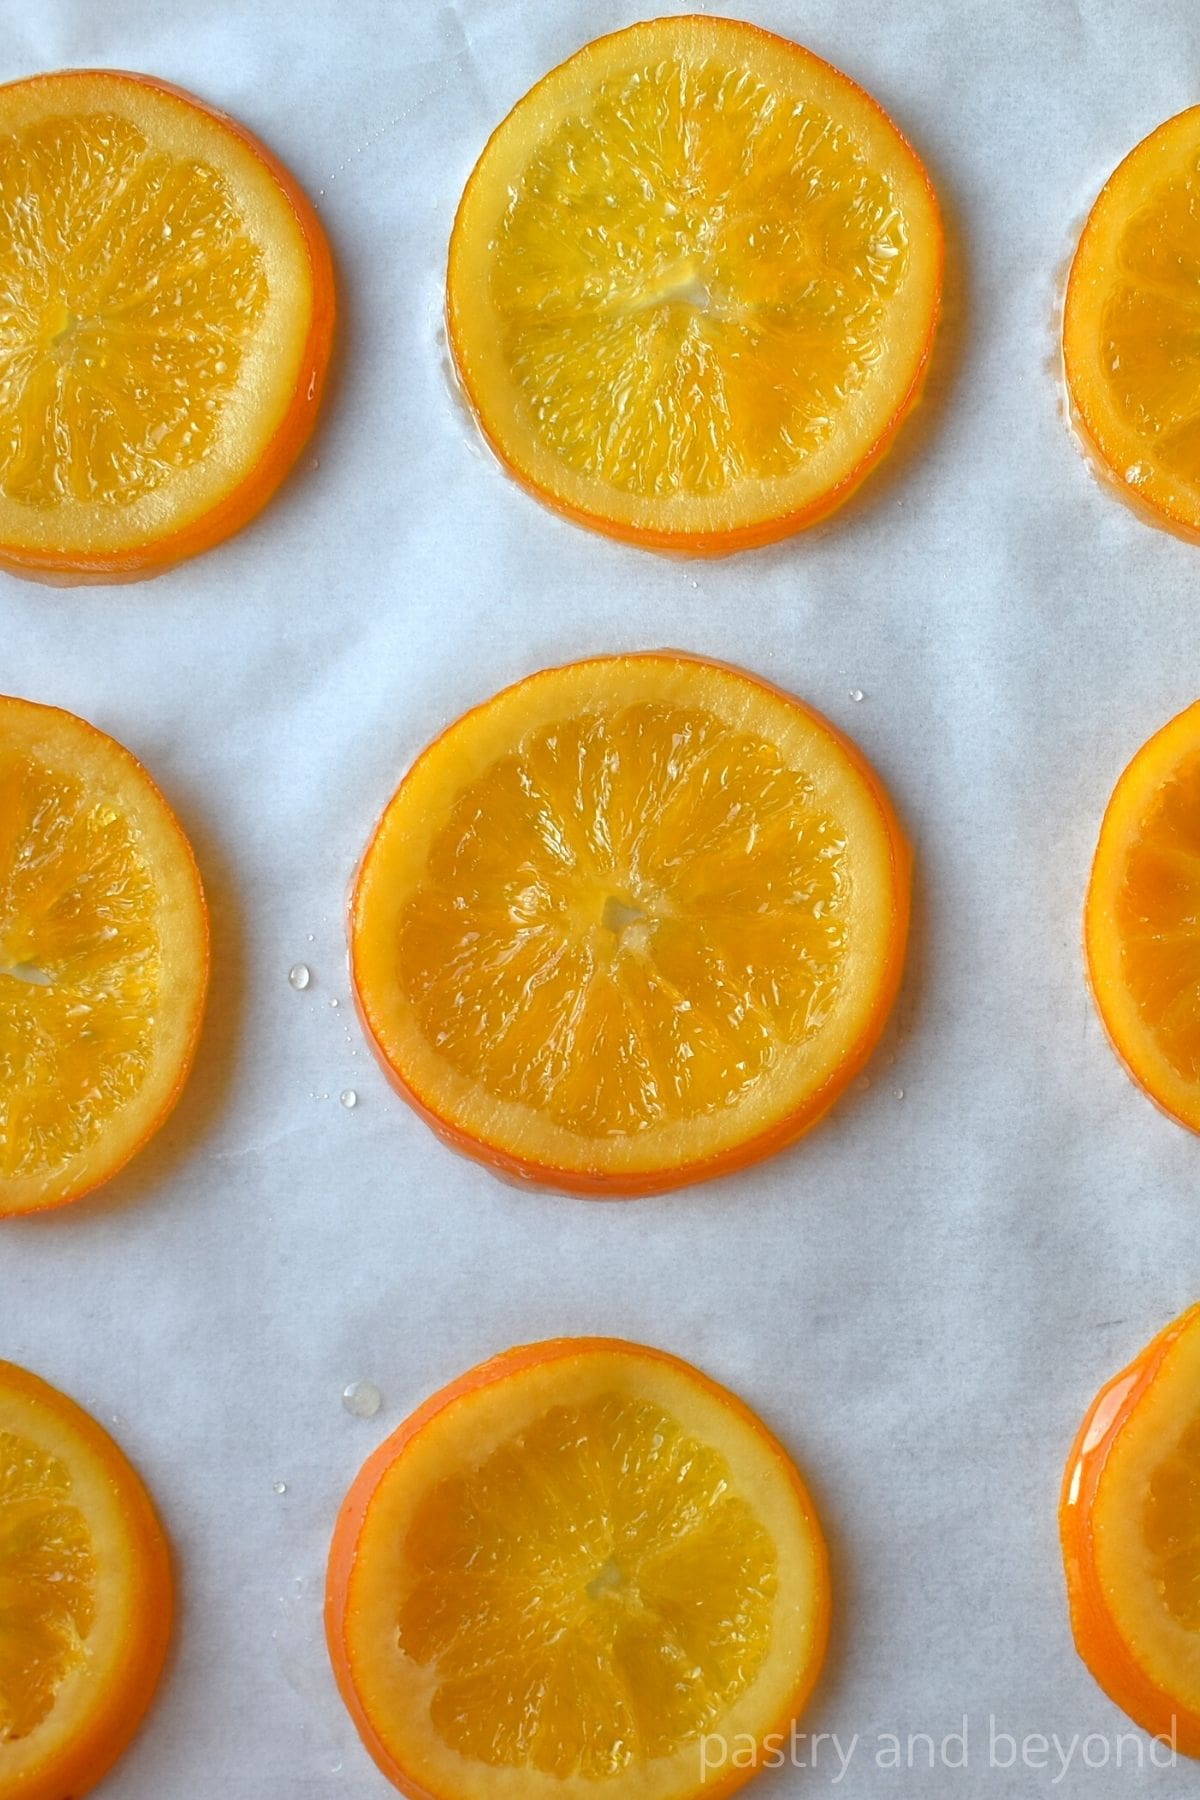
Once they are candied, I use tongs to remove them and let the excess syrup drip off before placing them on a parchment paper lined baking sheet.
I use the oven to dry the slices. I keep them in the oven for almost 1 and 15 minutes. They will be slightly sticky to the touch but this is the case even if you prefer to dry them 24 hours at room temperature too.
Once you remove them from the oven you have three options; keep them as they are, dip them into chocolate or cover them with granulated sugar that you place in a bowl.
I hope you enjoy these candied oranges!

You can store the candied orange slices at room temperature in an airtight container for up to 5 days, in the fridge for up to 2 weeks, and in the freezer for up to 3 months. If you store them as layers, you can place parchment paper between them to avoid sticking.
Other recipes you may like with oranges
- Chocolate Orange Shortbread Cookies
- Orange Cake Loaf
- Cranberry Orange Biscotti
- Orange Blueberry Muffins
I love hearing from you! If you try this recipe or my other recipes please leave a comment and give a star rating!

Candied Orange Slices
Ingredients
- 2 medium oranges
- 350 grams (1 and ⅔cup) granulated sugar
- 480 grams (2 cups) water*
Instructions
- Line baking sheet with parchment paper and set aside.
- Wash the oranges well. Cut into ⅛ to ⅙ inch (3-4mm) thick slices with a serrated knife or sharp (chef's) knife, or a mandoline slicer. If there are seeds, remove them gently.
- Place the orange slices in a pan and cover with enough water and bring to a boil over medium heat. Reduce the heat to medium-low and let it simmer for 2 minutes. Once it starts to simmer, prepare the ice old water by filling a large bowl with cold water and ice. As 2 minutes pass, remove the slices with a slotted spoon and put them into ice-cold water.
- Place the sugar and water in a large pan and put it over med-low heat and stir until the sugar dissolves.
- Once the sugar dissolves, add the orange slices. Without stirring, let the slices simmer at medium-low heat for almost 40 minutes or until they are almost translucent. You'll notice many mini bubbles on top of the slices when they are candied.
- Using tongs, remove the slices from the pan and let the excess syrup drip off back into the pan. Place the slices on a baking sheet that is lined with parchment paper. Dry them at 200°F(95C°) for 1 hour to 1 hour 15 minutes. If you like, you can dry them uncovered at room temperature; it takes almost 24 hours to dry. They will be a little sticky to the touch which you should expect after they are dried. (You can use the leftover syrup to flavor your tea or use it to flavor yogurt, etc)
- You can enjoy them as they are or dip them into chocolate or coat them with sugar.
